How to Transfer Emails from KMail to Gmail Account Instantly?
Communication via email is pretty convenient for users to make sure the client, employees, and others receive all the info correctly. Most of the users prefer the Gmail application over others these days. So, users like you generally migrate from KMail to Gmail, due to the different services that Gmail provides.
KMail is an email client that plenty of users have their accounts on & have been using for a long. The email client has many features like spam detection, end-to-end encryption, flexible configuration, & more.
However, there comes a time when users prefer moving to a more popularly known email service such as Gmail.
Gmail, in comparison to KMail, has more features and services that make communication over emails more successful & intuitive. Not only this, users transfer emails from KMail to Gmail accounts to keep a copy of their emails with attachments in another emailing platform.
Moreover, there arises a time when the user accomplishes all his needs and wishes to move to another email client to expand the business. So, collaboration is a part of Gmail which helps you to succeed with various deals for helping grow the business.
If you are new to all of this, don’t worry, the migration will be explained to you in a step-by-step manner am starting now!
Migration Techniques for Exporting KMail Data to Gmail
There is a configuration method that you can apply. Fortunately, Gmail has a configuration setting where you can sync your account & all the data.
Yet, this is a bit more towards the technical side. If you want a simpler solution, it has been explained in the section later.
First, we will be learning about the manual method, how it works, and what challenges you might face while performing it. Then, the simpler solution comes to ease up all your troubles.
Manual Transfer Emails from KMail to Gmail
Here, we will be using KMail to configure the account on the respective Mac mail account. Though, Gmail provides free POP3 & IMAP connectivity to the user who wants to access his emails via Gmail.
So, this is how we are going to perform it using the POP3 method. Following are the steps to initiate this process on Mac-
- Start by logging in to your KMail account on your Mac machine. Navigate to the Settings option and choose the Configure KMail.
- Then, move to the Accounts section.
- After that, choose the Receiving tab and click on the Add button.
- If you choose POP, navigate to the General tab to start migrating KMail emails to Gmail and enter the account name. For the Incoming Mail Server, enter gmail.com.
- Provide the Username and the Password for your account.
- Go to the Advanced tab from there and choose the Leave Fetched Messages on the Server option.
- In the Connection Settings, select SSL/TLS Hit OK.
- Now, move to the Sending tab and click on the Add button.
- From there, you have to choose the SMTP option and click on the Create & Configure option,
- Enter gmail.com in the Outgoing Mail Server field and mark the Server requires authentication option.
- To switch from KMail mailbox emails to Gmail, enter the Login ID and password. Mark the checkbox beside the Store SMTP Password option.
The procedure will start migrating emails, it will take time depending on the size of the mailbox on a Mac desktop.
Another method to migrate KMail emails to Gmail is the IMAP method. Let us see how this method works.
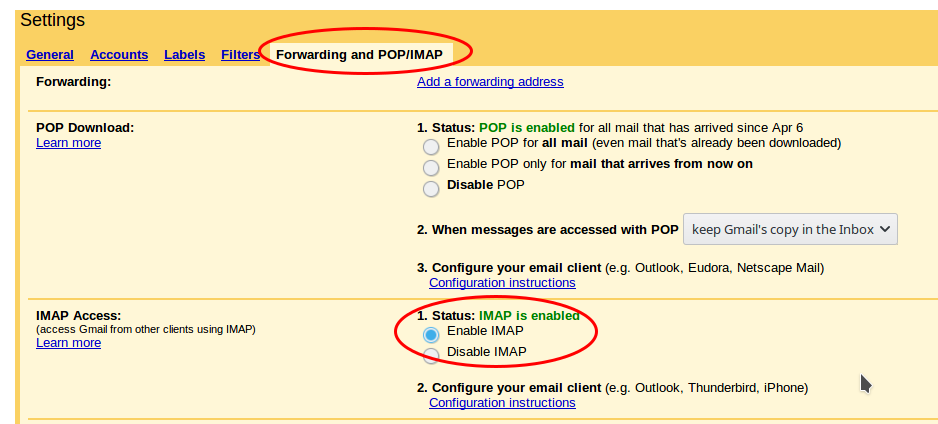
- On your web browser login to Gmail >> Seetings>> POP/IMAP Settings>> Select Enable IMAP.

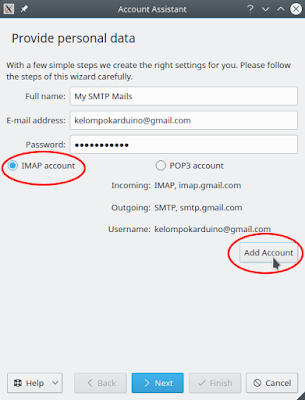
- Open KMail and from the Tools option select Account Wizard.
- Now enter the email and password and select “Find Provider Settings”.
- After that select “IMAP” and “Add Account”.

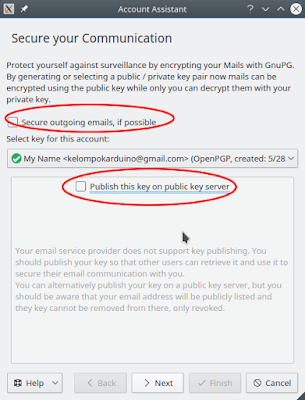
- To synchronize via IMAP, skip encryption options.

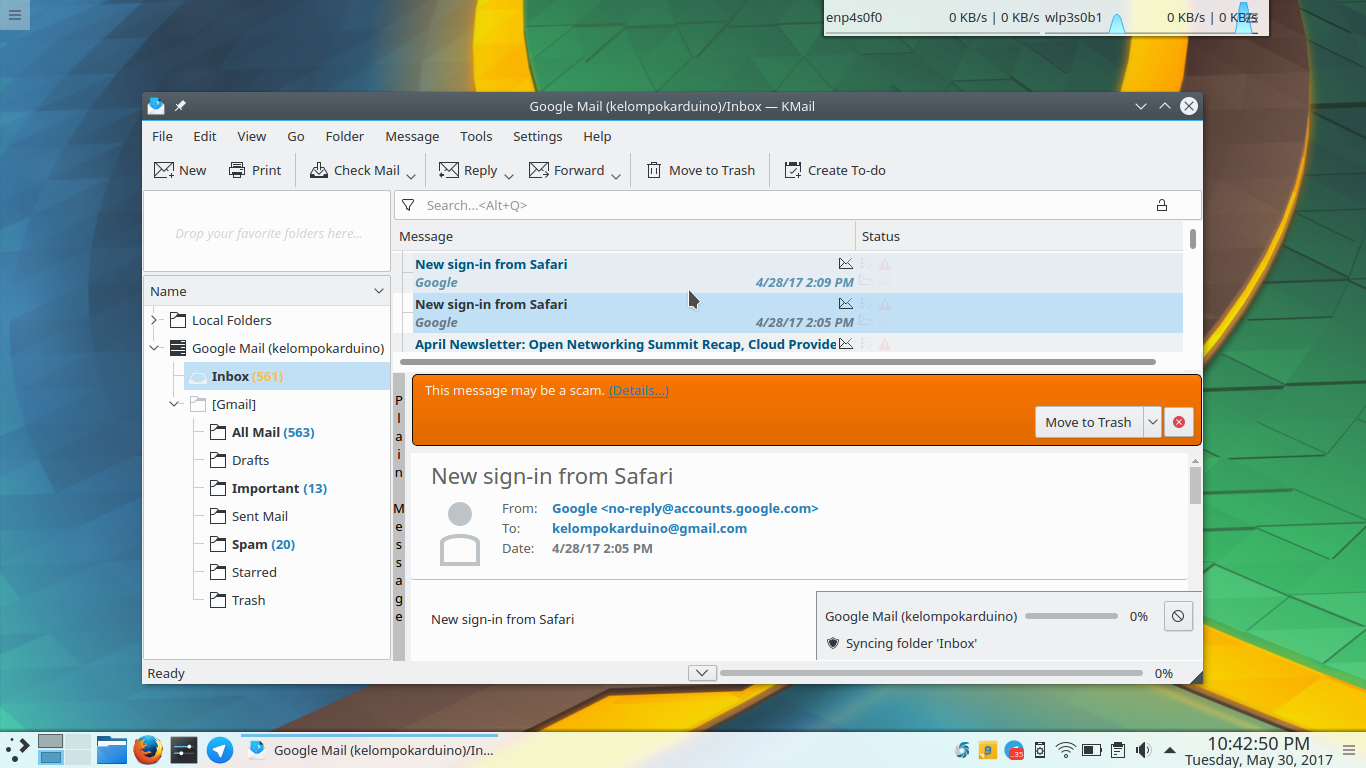
- Lastly, you will get all transfer emails from KMail to Gmail.

Manual Method Limitations to Consider
- Authentication failure errors are common. So, when a user enters the incorrect login details, they see the configuration error during KMail to Gmail migration.
- Moreover, in case the server discovers an unauthorized account, it immediately rejects any data from a non-existent email client.
- Likewise, this is a relatively complex procedure that doesn’t allow users to go through a smooth configuration.
- Also, if you are a non-techie or a newbie, it might become a task for you to understand the configuration settings.
How to KMail Add Gmail Account with Attachments on Mac OS?
With the help of IMAP Email Migration Tool Mac users have the option to send all of their emails directly to Gmail. Hence, the task of migrating the KMail to a Gmail account on a Mac computer becomes easy with the help of this tool.
Tip: You can also transfer iCloud emails to Gmail by following the steps from this guide.
You will not find it difficult to export data from multiple accounts at a time with the help of this tool. It is possible to insert more than one user ID during the mapping process to export data from other accounts as well.
The software is equipped with a Date-filter feature as well. This feature allows you to set a time duration by choosing the “from” and “to” dates.
Instructions to Transfer EmailsFrom KMail to Gmail on Mac
1. Install the software and run it on any version of a Mac machine first. Enter the Source as KMail and provide all the login details. To verify your account, click on Validate.

2. As the Destination, choose Gmail from the list. Give in the credentials for your Gmail account and hit Validate.

3. In the section below is the User Mapping List wherein the user IDs for the source & destination are available. To insert more, hit the Add button.

4. Click on the Start Migration button to begin the process immediately on the respective Mac machine.

In a Nutshell
However, transfer emails from KMail to Gmail migration is a difficult process. There comes great responsibility to transfer the data safely & make sure none of the content is missing. However, not every method can do so. Therefore, only the best techniques are given here. Being a non-techie can be a problem in performing the manual method on the respective Mac machine. Thus, to overcome all the limitations, we shared the software which is simpler to use and provides better results.

