How to Backup Emails in Outlook Mac 2019, 2016, 2011?


Want to know the best solution to backup emails in Outlook Mac, by using both the possible methods manual and automated solution. Read the upcoming section to know the complete solution to back up Mac Outlook emails. There are various reasons why the user needs to take a backup of their data but if you want to transfer or switch to other email clients like Apple Mail or MS Outlook etc. then you need a backup of your data to be converted according to the email clients.
Note: Apple Mail imports MBOX file format whereas MS Outlook deals with PST format. Some email clients support EML file format. Therefore, in the upcoming section, we will be going to explain the All One tool that assists you in backing up or converting your Mac Outlook OLM file into MBOX, PST, PDF, EML, EMLX, and 4+ file formats.
How to Download Emails From Outlook Mac?
Taking a backup of data regularly is a good habit as it will reduce the chance of data corruption, data loss, and other unfortunate events. Whereas downloading data from Mac Outlook 2019, 2016, and 2011 is not as simple as it may look. For that, you have to take care of certain things while using the manual method otherwise there will be the risk of data loss.
However, to download emails in Outlook Mac we have two different approaches-
So, read them one by one in the next section and just choose accordingly.
Manual Guide to Backup Emails in Outlook Mac
One can use the manual method to backup emails in Outlook for Mac, by the following steps:
- Open your Outlook and set up by adding a new category in Outlook.
- Provide a name as “Mac Outlook Backup”.
- Now, create a new rule and name it “30 days Mac Outlook Backup” and select Add all emails with a date sent/received older than 30 days.
- Use Ctrl + click & apply the 30-day Mac Outlook Backup consisting of your entire Outlook Mac mailbox.
- Now, set a reminder and navigate to the File menu choose the Export in Mac Outlook option, and select only to export mail data belonging to the category ‘Mac Outlook Backup’.
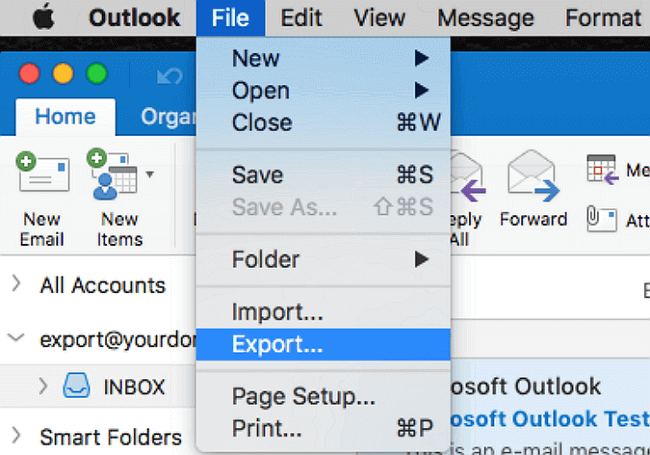
- Hence, by following the above steps you can get an OLM file with your emails older than 30 days which you re-import locally if required.
But the problem is that even the manual method is not a foolproof solution and also lacks sometimes. It also may lead to file corruption or data damage. So, in the upcoming session, we will provide you with a reliable solution for backup emails in Outlook Mac without any data loss and data corruption.
Automated Tool to Backup Emails in Outlook for Mac
We suggest you go for this instant and reliable solution i.e. Mac OLM Converter Tool. This tool is designed in such a way that is user-friendly and easy to use for all Mac users. Moreover, it provides you with different formats to download email from Outlook Mac, such as PDF, MBOX, CSV, ICS, etc.
Apart from these, you will be able to access all OLM files supported by Mac Outlook 2019, 2016, 2011, or earlier versions. So, using this tool you will be able to import OLM files into Apple Mail on Mac machine if required.
Even with the help of this automated software, you will be able to backup emails in Outlook Mac mailbox. This will eventually help you to free up the space of the file. In case, you want to read OLM files without Outlook for Mac then you can avail this software. Even it allows you to back up specific folders or files from Mac Outlook quickly.
Working on the Tool to Download Emails From Outlook Mac
Download and install Mac OLM File Converter on any version of the Mac operating system. After downloading, run the tool and follow the steps to backup emails in Outlook Mac-
- First of all, hit the Add file(s)/ Add Folder button for adding Mac Outlook files.
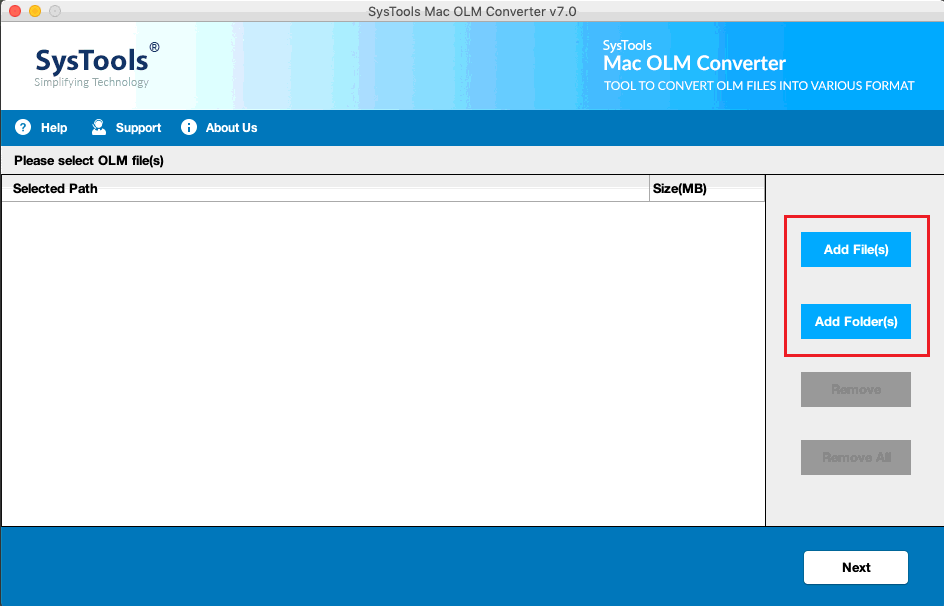
- After this, just browse the specific file and folder on your Mac system.
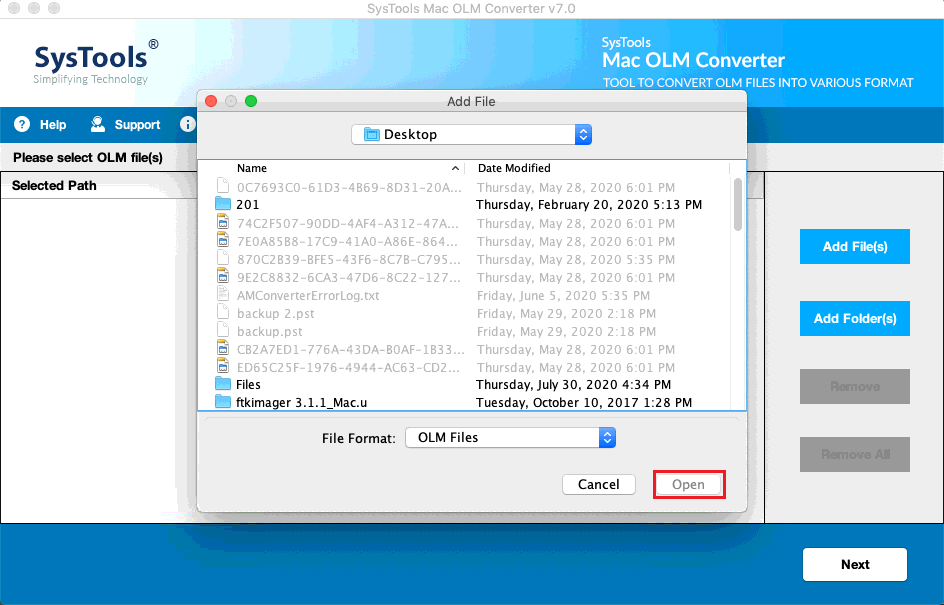
- Wait till your file has been added and then hit the Next button for the downloading procedure.
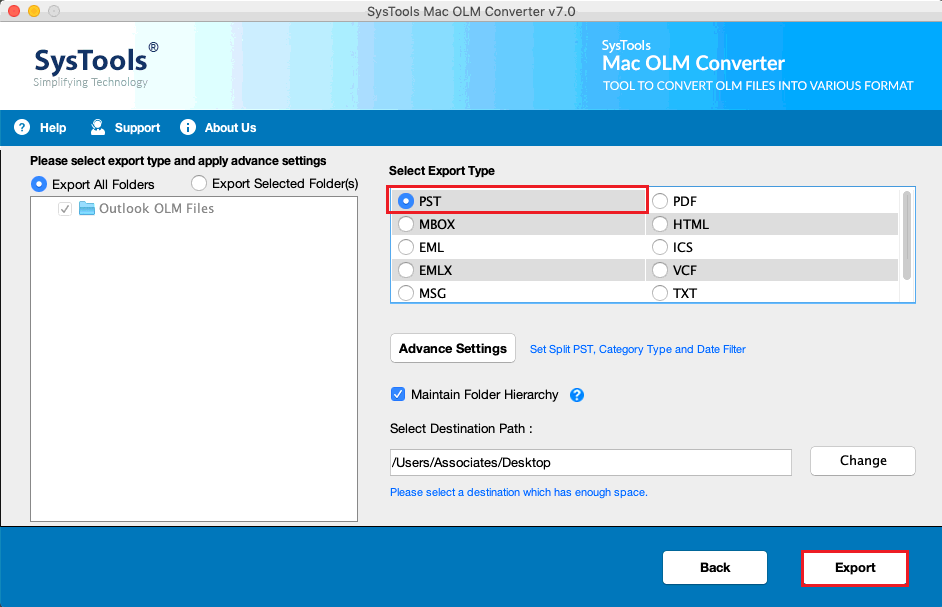
- Now, choose the required file format from the Export Type section to get the backup of emails.
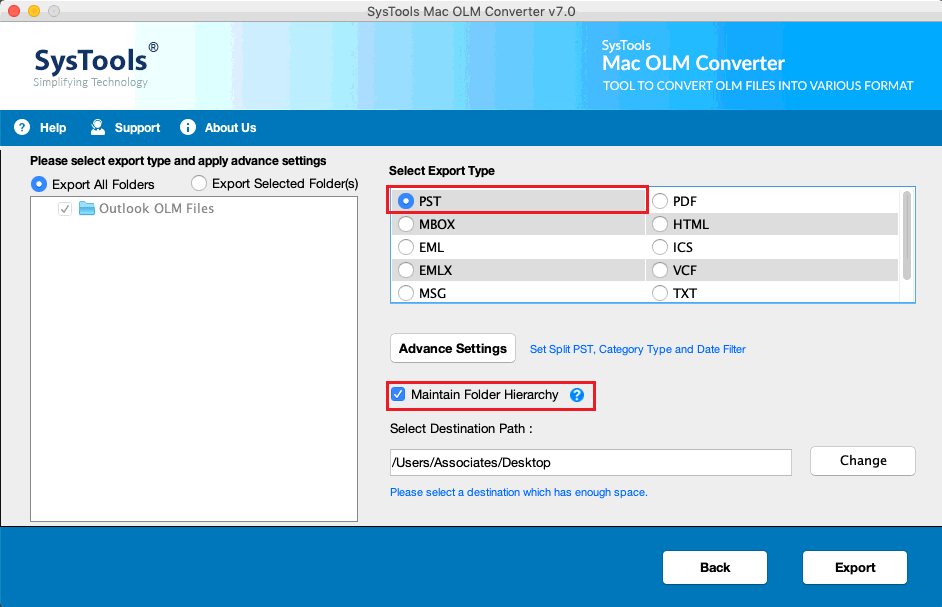
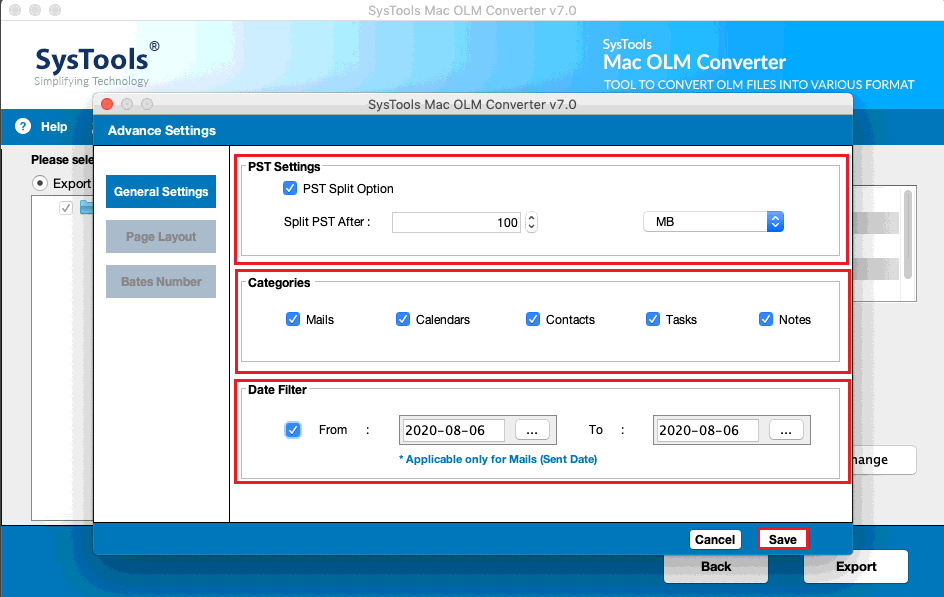
- You can also apply filters like PST Settings, Categories, and Date Filter on Mac-based computer.
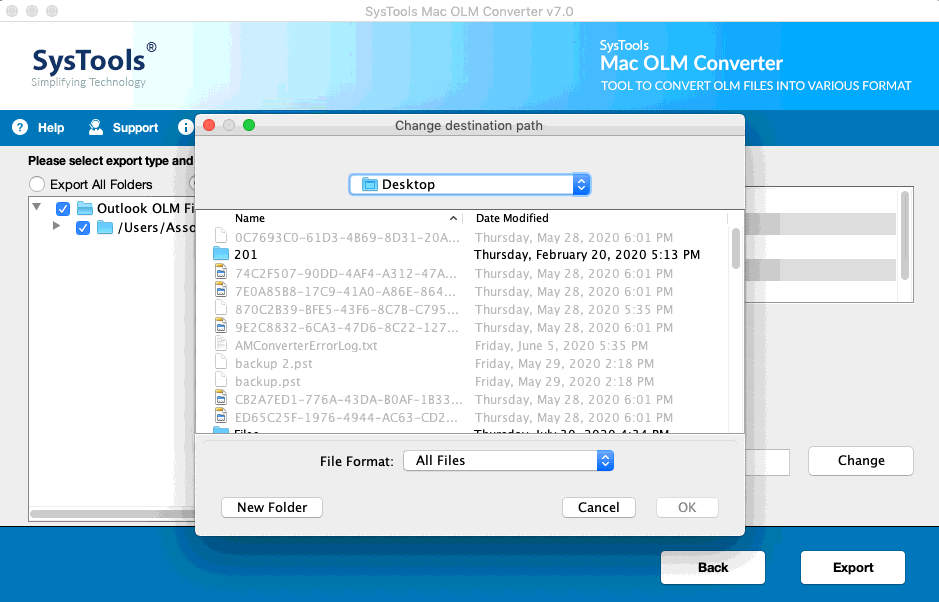
- Just after this, tap the Change button to browse the final location for the resultant file.
- Then, hit the Export button to begin the download email in Outlook for Mac process.
Key Features of the Tool on Mac OS
- Export multiple emails, contacts, and calendars from Mac Outlook to Windows Outlook. It supports all versions of Microsoft Mac Outlook 2019, 2016, and 2011 for backup.
- Assist you in adding files and folders for downloading Mac OLM files on your computer.
- Capable to download emails from Outlook Mac into multiple file formats, supported by other email clients.
- Permit to split large PST files into smaller ones as per your requirements.
- Moreover, it maintains the original folder hierarchy during and after the conversion process.
- Support all the latest versions of the Mac operating system to work effectively.
Conclusion
We have discussed both Manual and Automated features that assist you in backing emails in Outlook for Mac. In case, the manual method lacks you can opt for the automated tool. As this professional solution permits you to backup emails in Outlook Mac Outlook 2019, 2016, and 2011. That too without any technical assistance. We also explain the whole working procedure of both the methods manual and automated. Users can also download the demo version of the automated tool from the above link.